4 Ingredient Sweet Teriyaki Chicken Thighs
April 27, 2012 by Lynn
Filed under Featured Content, What's for Dinner?, Yummy Food
When I came home from the hospital after having my first baby a friend from church brought me this meal. IT WAS PERFECT! My baby was colicky and I had to be super careful what I ate. This was easy on me and the babe AND it tasted soo good! I know it wasn’t just the fact that all I had eaten for days was hospital food, this was really good. My husband made sure I got the recipe and we have been making it over the past four years. 
I still am not sure my friend has a name for this, so I just made up a name for it 😉 and will call it Sweet Teriyaki Chicken Thighs.
It is super easy too! This is a great meal for when you don’t have much time. Throw some rice in the rice cooker, broccoli in the streamer, and this in the oven. Waalaa, great meal everyone will love dinner.
All you need to do-
Preheat oven to 350 degrees
Put 1/2 cup sugar, 1/2 LOW sodium soy sauce, 1 cup of water, and 5-6 chicken thighs in a 9×13 baking dish. Bake for 30 mins or until chicken has an internal temp of 165. Flip chicken half way through…if you remember 
After the chicken is cooked, take out of dish and pour liquids into a pot on the stove top. Mix in a thickener, either 1 tablespoon of flour mixed into 1/4 cup of cold water OR 1 tablespoon of cornstarch with 1 tablespoon of cold water. Make sure it is mixed all the way before pouring it into the pot with the teriyaki liquids. With your stove on medium stir the flour or cornstarch mixture in until the liquids thicken up. Should take only a few mins.
Put chicken over rice and pour liquid over top. Done! EAT! 
AND EAT GOOD FOOD
Lynn-chiladas -White Sauce Enchiladas- YUM!
March 25, 2012 by Lynn
Filed under Featured Content, What's for Dinner?, Yummy Food
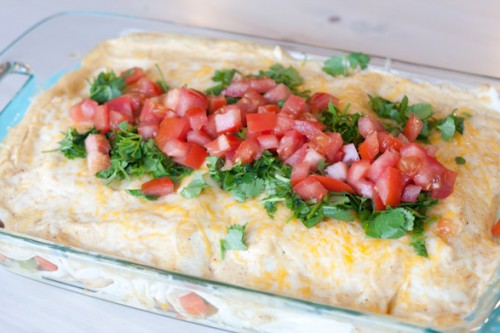
My mom, sisters, and I used to travel down to Oregon from good ol’ Puyallup Washington to visit my Great Aunt Mary. She would make us the best food! I loved her cooking. I tried a lot of delicious things at her house, things I hadn’t had before. Like the first time I had a homemade strawberry milk shake, soo good. I thought I was in heaven. One night she made these white sauce chicken enchiladas. I probably ate half the pan full. I loved them, like everything else my aunt made, and begged my mom to get the recipe.
This stayed my favorite home cooked meal clear through my first child was born. Then, for some strange reason I stopped making them. I kinda forgot about them…weird. But, last week I had a major 4 1/2 month pregnancy craving for them. I went to the store and bought all the goods. I have never used a measuring devise of any kind to make this, I know this recipe by heart and by eye. I did however make sure to measure it all out this time so I could share the goodness with you.
I have not just loved eating this dish, but also making it. I am not sure why, but it’s one of those dishes that just makes me feel happy inside to make. Maybe all the good memories I have with of traveling to my aunts house and my memories with her. Maybe all the times my mom cooked it “just” for me or the times I cooked it and shared it with good friends. I made it so much in college (partially it was one of the only things I knew how to cook) that my friends dubbed them “Lynn-chiladas” haha.
I hope you and your family can enjoy this dish as much as I have. 
To get a printer friendly version of this recipe click HERE. This will take you to box.net where you can print the recipe to your home computer.
“Lynn-Chiladas”
White Sauce Enchiladas
1lb chicken
½ medium onion
1 tablespoon olive oil
½ teaspoon seasoning salt
4 carrots chopped
2 bell peppers (any color)
8 large tortillas
2 cups shredded cheese, Mexican mix
1 cup sour cream
1 10.5 oz can of Cream of Chicken soup
½ teaspoon chili powder
1/8-1/4 cup of milk
½ cup chopped cilantro
½-1 tomato
Pre-heat oven to 350 degrees.
Warm a pan on the stove with olive oil. Cut the chicken into bit size pieces. Add chicken, chopped onion and seasoning salt to pan. Cook the chicken through.
Chop carrots small. Add the carrots to pan and cook for about 7 minutes.
Cut bell peppers into strips and add to pan. Cook for another 5-7 minutes.
Take off stove. To make the sauce, in a bowl mix together cream cheese, cream of chicken soup and chili powder.
Set up an assembly line in this order: tortillas, sauce, chicken and veggies, and shredded cheese.
In a 9×13 dish spread about ¼ -1/2 cup of sauce on bottom of pan.
Take your tortilla, spread sauce, a scoop of chicken and veggies, and then sprinkle on cheese.
Roll up your tortilla and place in pan seam side down. Your pan should fit about 8 rolled up tortillas.
Mix milk into remaining sauce and add to the top of the tortillas.
Cook for 20-25 minutes. Take dish out and add remaining cheese to the top of the dish. Place dish back in oven until melted, about 3-5 minutes.
Chop up tomato and cilantro and to the top of the dish after it has cooled for a few minutes.
Serve and ENJOY!
Get Cook’n with Your Bad Self!!!
Simple Clean Living Blog and Cranberry Salsa
December 16, 2011 by Lynn
Filed under Featured Content, Friday Feature, Snacks/Appetizers, Yummy Food
Simply Clean Living is a blog written by a good friend of mine, Katie. I love her tag line, “Organizing life and surviving motherhood, one late night at a time” She has everything from great craft projects to do with your kids, money saving tips, organizing tips, yummy recipes, and thoughts on motherhood. I love Katie’s stories about motherhood and the way she writes. Here is one of my favorite posts of hers, that I needed after one hard day. It’s called “Down and Dirty: Motherhood Real-Life” READ HERE
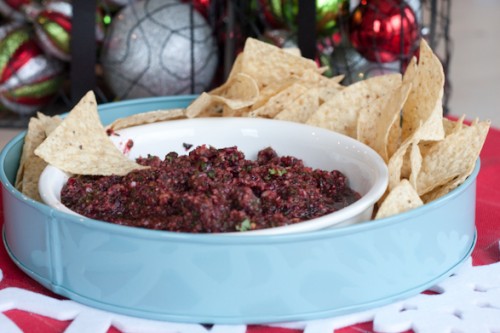
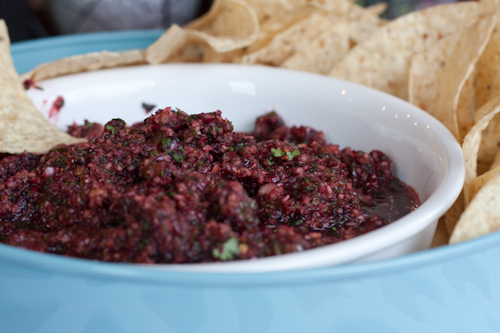
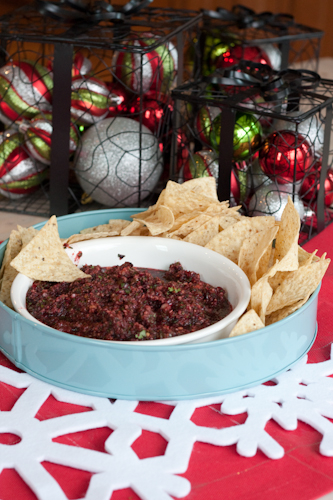
Also here is a super good salsa recipe she shared last week. I remember her bringing this one Thanksgiving 3 years ago and I think I have craved it ever since. It is good! And it’s great to take to a holiday party.
Cranberry Salsa
Katie has provided a Printable Version here
Ingredients
- 1 (12 ounce) bag of fresh cranberries
- 1 bunch cilantro, chopped
- 1 bunch green onions, chopped
- 1 jalapeno pepper, seeded and minced
- 2 limes, juiced
- 3/4 cup white sugar
- 1 pinch salt
Combine cranberries, cilantro, green onions, jalapeno pepper, lime juice, sugar, and salt in the bowl of your food processor, and chop to desired consistency. Our food processor is not big enough for this entire batch at once, so I mix it in a bowl, and then put it into the food processor in batches. This salsa is best made the night before or a few hours before, and refrigerated so that the flavors have a chance to blend, but do not make more than a day in advance. Serve with tortilla chips.


Party Appetizer
December 15, 2011 by Lynn
Filed under Featured Content, Snacks/Appetizers, Yummy Food
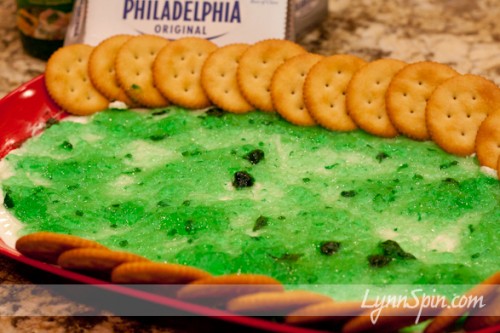
This might look a little weird, green and all. But! Don’t let that get to you, it is GOOD! And, I am not the only person who thinks so. I recently took this to an ugly sweater Christmas party and it was gobbled up fast. And it is fast and easy to whip up before a party when you running around crazy to get ready. I think that is called perfection. 
What cha’ do?
Well buy some cream cheese, Reese’s mild Pepper Jelly, and Ritz crackers.
Spread the cream cheese on a platter, then spread the jelly on top. Set some crackers around the rim and head off to your party!
Go party with your badself!!
Plum Fruit Leather
November 10, 2011 by Lynn
Filed under Featured Content, Snacks/Appetizers, Yummy Food
You can make any kind of fruit leather following these simple directions.
We have a plum tree in our yard so we used our beautiful plums. FYI- all pictures after this one are slightly blurry. Sorry 
So easy to make fruit leather. All you need is SWEET, RIPE FRUIT.
We cut the plums in half and let Charlie, our 3 year old, pull out the pits and sort them. She thought it was great to help and she was crazy fast at it. We are always looking for an easy safe step Charlie can help with cooking.
After pitting the fruit, then place in the food processor till it is pureed nice and smooth.
Spray Pam on your dehydrator sheets. Then pour the pureed plums onto the sheets and turned it on the fruit setting. (Make sure you pray Pam or you will not get the fruit leather off the sheets.)
Place the lid on and let it do it’s thing. Leave it there until it is firm enough to peel about 12-16 hours, depending on your dehydrator.
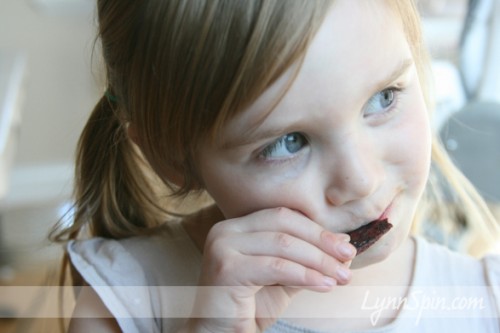
Enjoy!
Spider Pancakes!
October 31, 2011 by Lynn
Filed under Breakfast, Yummy Food
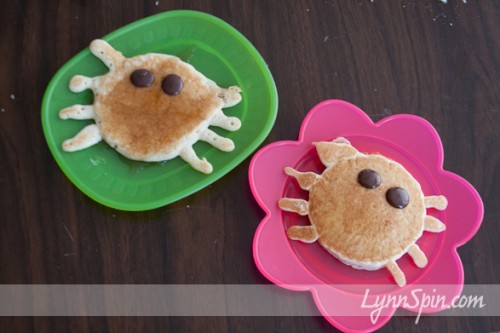
This morning we had some delicious spider pancakes. Here they are… nothing fancy, but my kids loved them 
Last night after tucking Charlie into bed she asked me, “Mom do we like webs?” I said, “Yes, on Halloween we do.” She then told me this in a spooky voice, “Well spiders live in webs and they bite people and little children, this night on Halloween!” hahaha on man she is a funny child. I decided I would make her spider pancakes this morning, she is so excited for Halloween, she can barely contain herself. Fun times.
I just used a baby medicine syringe to make the legs.
Happy Halloween!
Dinner in a Pumpkin!
October 31, 2011 by Lynn
Filed under Featured Content, What's for Dinner?, Yummy Food
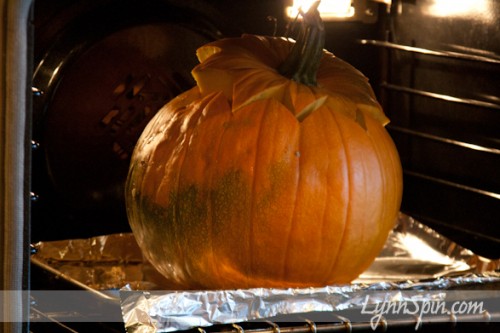
This is a Halloween tradition for my husbands family, newly adopted by our little family too. The kids think it is fun to watch the pumpkin in the oven and then scoop their dinner out of it. Here is the recipe! Enjoy!
Dinner in a Pumpkin
1 small to med size pumpkin
1 med onion chopped
2 TB oil
1 1/2-2 lbs hamburger
4 TB soy sauce
3 TB worcestershire sauce
3 TB brown sugar
1 4oz can of sliced mushrooms, drained
1 can cream of chicken soup
1 1/2 cups of cooked rice
2 8oz cans of sliced water chestnuts, drained
Pre-heat oven to 350 degrees. Scoop out the insides of your pumpkin, drawn a face on it, and set it on a foil covered cookie sheet in oven to get it started cooking while you do the rest.
Brown the hamburger and onion in oil. Add the soy sauce, worcestershire sauce, brown sugar, mushrooms, and cream of chicken soup, simmer. Add rice and chestnuts.
Then pull out your pumpkin and put mixture inside. Put lid on pumpkin and put back in the oven to cook for 1 hour or until the inside of the pumpkin is cooked. Scoop out mixture and a little of the inside of the pumpkin and serve!
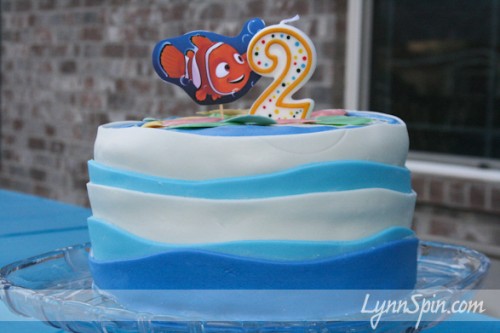
Marshmallow Fondant and Nemo Wave Cake
October 17, 2011 by Lynn
Filed under Birthday Parties, Cake, Featured Content, Holiday Crafts, Yummy Food
Marshmallow fondant is pretty stink’n easy to make. My sister in law makes some awesome cakes with marshmallow fondant. Over the phone, a few states away, she helped me make a sweet cake for Beck.
Here how I made my marshmallow fondant wave cake.
You will need to have:
1-2 packages of marshmallows, big or small.
2-5 tablespoons of water
About 8 cups of powdered sugar. 1-2 bags
vanilla, almond, or any kind of extract for flavoring
If you are doing all one color then go ahead and melt all your mallows in the same bowl. If you want to do a few different colors, split them up before melting them. Put your mallows in a microwave safe bowl and add 1-2 tablespoons of water. Stir them around until they are all slightly wet. Put a few drops of your extract in now. Add more water if needed, but just a little at a time. Place in the microwave on high for 30 seconds. Open and stir. Continue microwaving for 30 second until your marshmallows are melted.
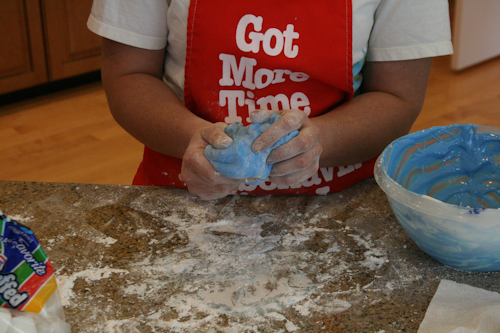
My apron says “Got more time for misbehave’n, since I started microwave’n.” Pretty sweet, I know 
Once they are melted, pour 1 cup of powdered sugar into the bowl. Mix until it thickens up. Spread powdered sugar on the counter. Take the fondant out of the bowl and start to knead it. It will be very sticky! My sister in law recommends putting shortening on your hands to help. She also adds about 1/2 cup to her fondant, but I didn’t. You can do it either way.
Keep kneading and adding powdered sugar until becomes a firm ball. It will still be a little sticky when it is stretched out. No worries. Place ball, double wrapped, in saran wrap over night. It will not be as sticky they next day.
When you roll it out make sure there is flour underneath to keep if from sticking to the counter. You will not see that side of the fondant. You might also need a little flour on the rolling pin, but if it shows on your top side just take a damp cloth and wipe it off.
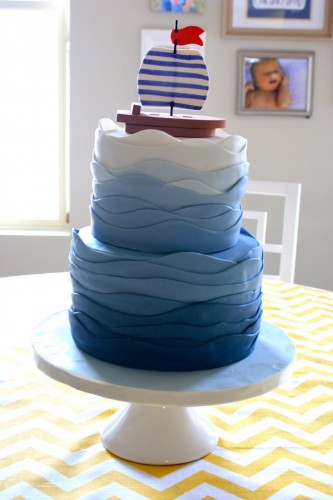
I was inspired to make these waves from this picture I saw on 6th Street Design School Blog. Check out this blog. It has a lot of beautiful stylish ideas for your home.
I love this beautiful wave cake, but I am not yet up to this kind of cake making par. So, I made just one tier. I used three different fondant colors. AND, I used a box to make my cake 
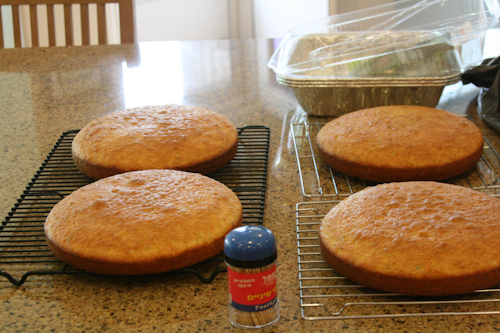
After making these and letting them cool for a bit; I trim off the tops to make them flat. I then layered them with frosting and home made raspberry jam.
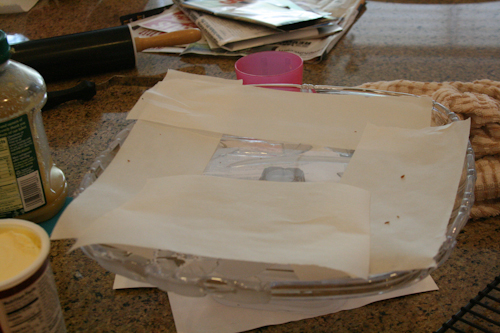
This handy tip I learned from Sandra Lee. Place some parchment paper like so on your cake stand. This helps to keep the cake stand clean and you won’t have to try to move it once it’s iced either. Place your bottom cake piece down and begin to layer on here.
Once you’ve completely iced the outside of your cake with a thin layer of frosting, you can place your fondant on. Roll out your fondant (if you haven’t already) and cut it wavy like with your pizza cutter. Start at the top of the cake and layer going down. This can be tricky, but hopefully the little layer of frosting you put on the cake will act like glue and hold the waves on. I also put tooth picks in the back of the cake, until the waves were secure. Once it is ready for the party remove the parchment paper by gently pulling it out from under the cake.
You can do it! Make a cool cake for your kid. Then proceed to do a happy dance. You deserve it. 
Nutty Lynn’s Crunchy Granola
October 11, 2011 by Lynn
Filed under Breakfast, Featured Content, Yummy Food
Thanks for reading!
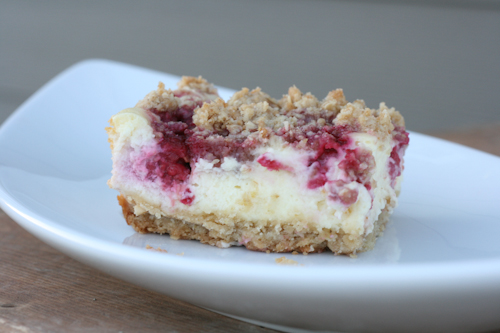
Lynnie’s Raspberry Cheesecake Crumble
September 1, 2011 by Lynn
Filed under Dessert, Featured Content, Yummy Food
Sorry this post has been moved to my new blog. Please click the image below to get to the recipe. 


