Yo-Yo Necklace or Broach
Here is what you need:
Yo-Yo makers- two sizes (med and small)
thread and needle
fabric scaps that coordinate
buttons/gems
ribbon
felt
hot glue gun
Yo-Yo’s are super easy to make. They look great as embellishments, hair bows, and now this sweet necklace. It took me about an hour or more to make and I think it is fun. Hope you enjoy this tutorial.
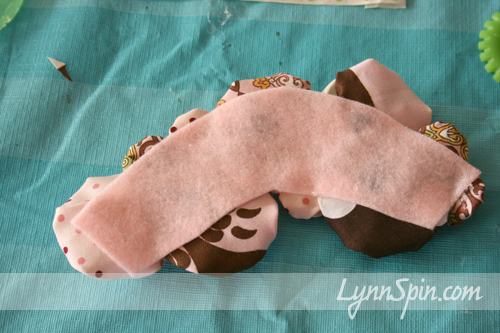
First cut a piece of felt the shape you want your necklace to be. Pick out your fabrics and start making your yo-yo’s. (Use instructions on yo-yo maker package, you can get this at Michael’s or Jo-Ann fabrics)
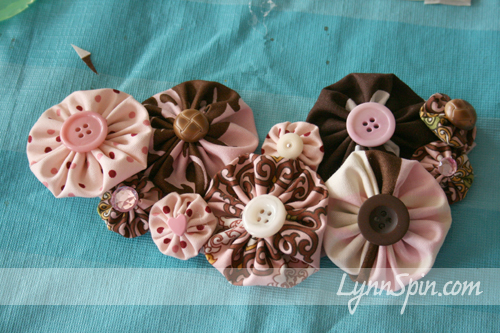
Once all your yo-yo’s are done; decide on the placement and glue with hot glue gun. Apply gems and buttons (can do before or after glue to felt).
Then if making a necklace glue on ribbon- length is up to you. Or glue a pin down if making as a broach or to attach to a purse as embellishment.
Glue another piece of felt on top of the first piece to hide ribbon ends.
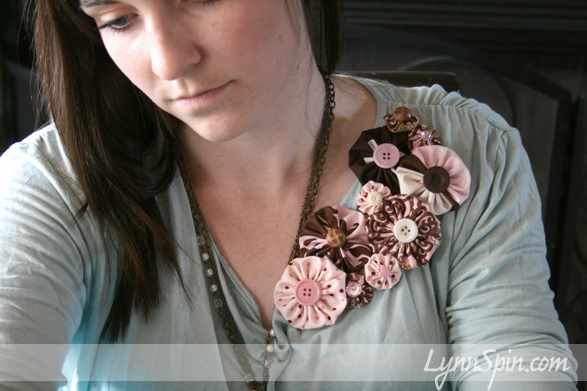
And waa-laa your done. Put some jewelry on your bad self! 
Thanks for being my model Jackie! And yes the broach looks good 
Girly Hair
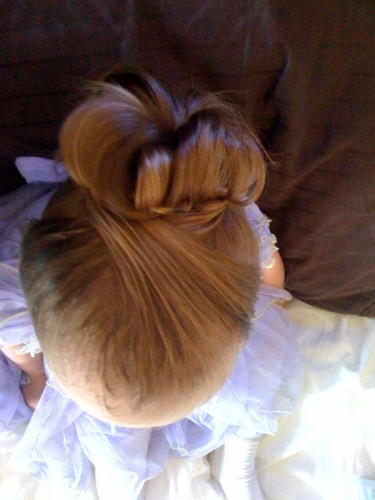
Lately I have been on a hair-do kick with my two year old. She has such beautiful long hair and if I am going to keep it long I have to start doing cute do’s. I literally “have to” because otherwise she looks like a ragamuffin
Pronunciation: \ˈra-gə-ˌmə-fən\
: a ragged often disreputable person; especially : a poorly clothed often dirty child
HAHA…Ahhh I love that word in reference to my children lol. Anyway, in my pursuit of non-ragamuffin children I have found some awesome blogs with step-by-step instructions on how to do very cute hair styles. And trust me, I could barely do a ponytail, these blogs have great instructions YOU CAN DO IT! The hardest part is probably just getting your child to sit still. Mickey Mouse Club House is how we accomplish that obstacle…and occasionaly a high chair with good strapes 
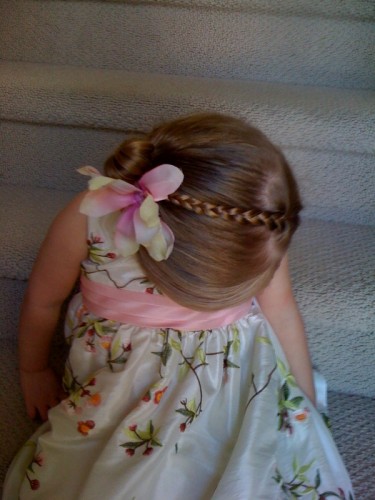
Here are a few pictures of the ones I have tried on Charlie. (pics taken on my phone)
And here are the blogs I like best!
http://shedoeshair.blogspot.com/
http://www.babesinhairland.com/
Painting Tips from Lynn
July 4, 2010 by Lynn
Filed under Furniture Redos, Home and Garden
Sorry its been forever since I have posted anything. I always think summer is going to slow things down, but nope! Seems to have gotten crazier at our house. Anywho, you clicked on this little post because you want to paint something! Love it! Paint gives new life to some many things. Your kitchen cabinets, furniture, walls… you name it. A friend sent me an e-mail today, asking if I knew how to help reduce paint brush strokes. I thought, BLOG IT! Hahaha… After our house flooded a few years ago, we have just about repainted every wall, ceiling, and cabinet door in this house. (I also love to buy furniture off craigslist and fix it up! I have to say this quietly b/c the hubbs is not really a fan of me bringing home stray furniture. shh…) 
Tips! (these are from trial and error, paint service desk people, and from Aunt Kathy my paint go to lady)
Number 1! When painting your cabinets or furniture, to reduce the brush strokes use a product called Floetrol. You mix it into your paint and it helps smooth things out. If you want things really smooth you will have to rent a sprayer.
Number 2 Primer!! Use one, they help a ton. And when you are painting something dark, have the paint guys tint it gray for you. That will save you time and money!
Number 3 This goes with number 2, but Kilz really is the best primer/stain blocker there is. I had a stain on my front door, I used two other primers before trying Kilz. It was the only on that the stain didn’t leak through.
Number 4 If you use a water-based paint and then need to use a clear coat of varnish to help it stay strong, MAKE SURE that the varnish is also water-based or it will yellow over time. Same with oil paint= use oil-based varnish.
Number 5 Lowes and finally Home Depot have little 7 ounce cans that you can buy. These are great for testing a color in a room. And DO test it out BEFORE painting. You will be happy you did. Nothing worse that painting an entire room than hating the color. Trust me…I still need to repaint Beck’s room, but it’s not going to happen anytime soon. Oh! and don’t just paint a little stripe of color on one wall, do a 10×10 square on a few walls. Color will look different on each wall depending on how the light hits each wall.
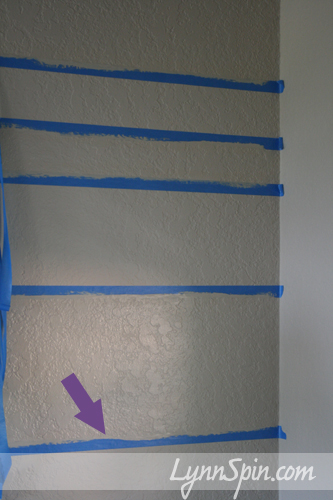
Number 6 My latest experiment-Stripes! When painting stripes, first paint your main wall color. Then tape off the stripes you want using the fine blue painters tape. Then use main wall color again to go over tape just a little to cover any gaps between the wall and the tape, so stripe color doesn’t leak under tape. Let that dry then paint stripes. Let dry and then remove tape. Stripes are so pretty and a great way to add interest to a room. I will post some more pictures when I finish my room.
Number 7 Paint architectural details, people in magazines and on TV design shows are always saying this, but it really adds to a room. Check out my cool window. I painted the inside lip brown and the outside a light tan popping off the gray walls. I love it.
Number 8 I should have put this one up by the furniture/cabinet stuff, but sand as best you can then wipe clean before priming. You don’t have to sand everything off or strip paint before you paint. Yes, it helps and is a must if you are staining the wood. But other wise just sand a bit so the paint has something to stick to and use a really good primer. You will be set.
Number 9 Don’t be afraid of dark colors or painting your ceiling. I just painted my bedroom. Gray walls, gray/blue ceiling, and chocolate brown fire place. It so beautiful. My husband was a little nervous the ceiling would look low and make the whole room very dark. But, now that it is all done, it is so inviting and pretty :). Paint your ceiling! (warning neck may hurt and paint may fall in eyes, just to let you know:))
Number 10 If you want the lines where your ceiling and walls meet to be perfect; get over it, hire someone else, or…use a little art paint brush to tidy up any bumps.
Number 11 Buy good brushes. Clean them good when you are done. Brushes can be expensive, but if you have more than one project and take good care of them; it will be worth it to pay a few more dollars.
I know I have more tips, but that’s all I can think of right now. Feel free to post a question or e-mail me and I will try to answer your painting questions the best I can. And have fun!! It is so nice to give new life to a room or peice of furniture. You will feel so good when you finish! Get Painting with Your Bad Self! I will post before and after pics of my room when I finish the molding and everything.


