Spider Pancakes!
October 31, 2011 by Lynn
Filed under Breakfast, Yummy Food
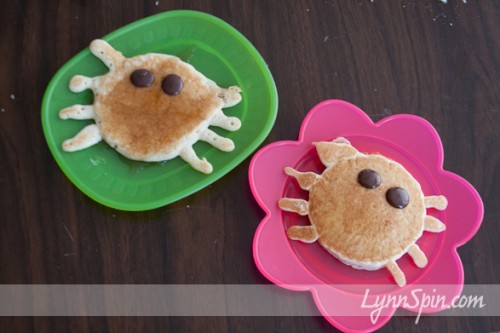
This morning we had some delicious spider pancakes. Here they are… nothing fancy, but my kids loved them 
Last night after tucking Charlie into bed she asked me, “Mom do we like webs?” I said, “Yes, on Halloween we do.” She then told me this in a spooky voice, “Well spiders live in webs and they bite people and little children, this night on Halloween!” hahaha on man she is a funny child. I decided I would make her spider pancakes this morning, she is so excited for Halloween, she can barely contain herself. Fun times.
I just used a baby medicine syringe to make the legs.
Happy Halloween!
20 Minute Pumpkin Bag- Easy Printable Pattern
October 31, 2011 by Lynn
Filed under Crafts, Featured Content, Halloween, Holiday Crafts
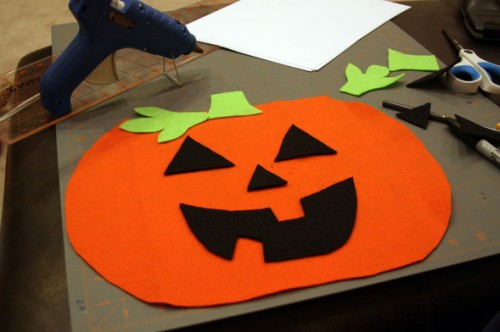
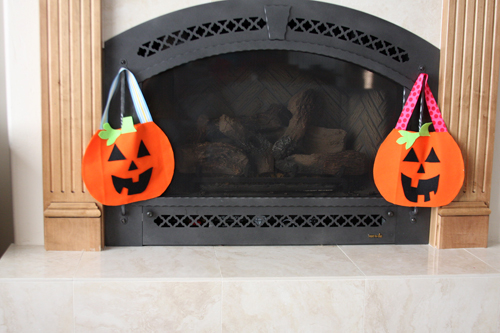
If you need a pumpkin bag for tonight, here is your last minute bag pattern and tutorial. It is soo easy! And, no sewing required. Just grab your scissors, hot glue gun, and felt. Print out my pattern and go to town. 
Happy Halloween!!
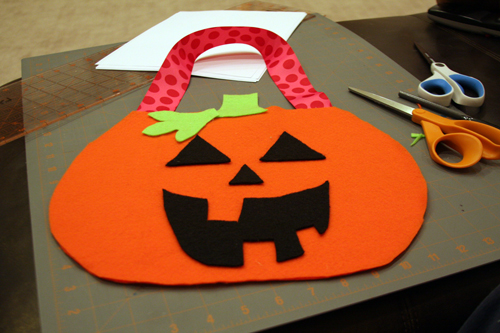
Follow the pattern and cut out all your pieces. Hot glue a 22 inch piece of ribbon on to the inside of your back piece and set it aside.
Glue the face onto the front of your front piece.
Then take the back pieces and put a thin line of hot glue all the way around the outside edge of the pumpkin DO NOT GLUE THE TOP EDGE! That is the opening. 
Lay the top piece on. Taa Daa! 20 minute (maybe less) pumpkin bag done!
If you wanted to make it a little fancier you could sew the pieces on then sew it together. It would look great with some fun stitching around the edges. Get Crafty!
My kids where super happy to find these this morning. I love Halloween 
Print the patterns – click HERE for bag and HERE for the face pieces.
Dinner in a Pumpkin!
October 31, 2011 by Lynn
Filed under Featured Content, What's for Dinner?, Yummy Food
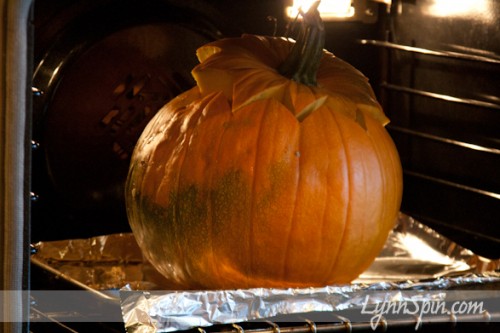
This is a Halloween tradition for my husbands family, newly adopted by our little family too. The kids think it is fun to watch the pumpkin in the oven and then scoop their dinner out of it. Here is the recipe! Enjoy!
Dinner in a Pumpkin
1 small to med size pumpkin
1 med onion chopped
2 TB oil
1 1/2-2 lbs hamburger
4 TB soy sauce
3 TB worcestershire sauce
3 TB brown sugar
1 4oz can of sliced mushrooms, drained
1 can cream of chicken soup
1 1/2 cups of cooked rice
2 8oz cans of sliced water chestnuts, drained
Pre-heat oven to 350 degrees. Scoop out the insides of your pumpkin, drawn a face on it, and set it on a foil covered cookie sheet in oven to get it started cooking while you do the rest.
Brown the hamburger and onion in oil. Add the soy sauce, worcestershire sauce, brown sugar, mushrooms, and cream of chicken soup, simmer. Add rice and chestnuts.
Then pull out your pumpkin and put mixture inside. Put lid on pumpkin and put back in the oven to cook for 1 hour or until the inside of the pumpkin is cooked. Scoop out mixture and a little of the inside of the pumpkin and serve!
Black Sticks, Skull, Boa, and Crows…Spooky!
October 27, 2011 by Lynn
Filed under Halloween, Holiday Crafts
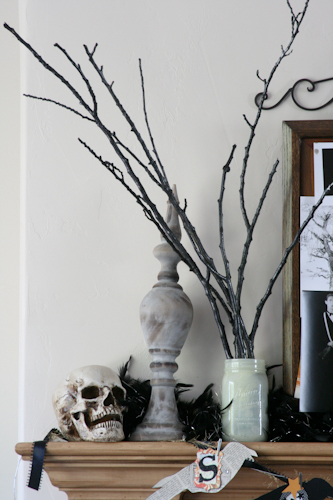
I spray painted these black sticks, also mentioned HERE, AND I spray painted the inside of the glass jars I put them in. I love the look of the glass jars sprayed inside only.
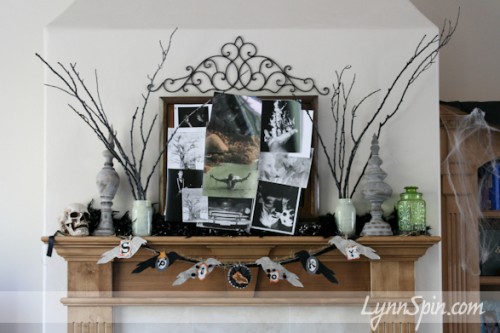
Here are some more pictures of my spooky mantle  The collage of pictures is from my husbands photography class in high school, I found them and thought they would be fun for Halloween decor. And it’s fun the see his brother and friends when they were young and being silly
My sister in law and I made these crow/spooky garlands a few years ago. I love it. 
Here is the template for the crows if you want to make your own. 
-Click here for crow template-
Spray paint something! And as always…
Spray Painting Sticks
October 25, 2011 by Lynn
Filed under Decorating, Halloween, Holiday Crafts, Home and Garden
This time of year a lot of people are trimming up their trees and have a bunch of twigs and sticks leftover. Well, I was lucky enough to find a friend that had a huge pile!  And she was kind enough to share with me. I grabbed some tall and short ones for two different projects I had in mind.
The first one was for my front porch. I took all the longs ones and sprayed them two different shades of green and of them some silver. The short ones are for my fire place mantel. I sprayed those black and then added a bit of shimmer with my metallic spray paint.
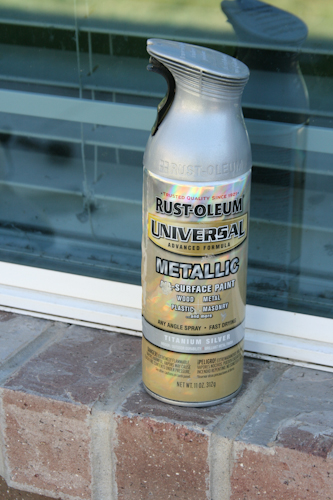
FYI- The two metallic spray paints in these pictures do very different things! The one in the top picture will give you a super shinny silver and the bottom on will be more of a light shimmer. You will see color through the bottom one, you will not with the one in the top picture.
I laid out the sticks in my yard and sprayed them all. I used the colors that I did, because that is what I had. I wanted black and green. My favorite brand of all of these is Rust-o-leum. I don’t say that because they pay me to hahaha, I wish 😉 I say this because you don’t have to really follow all the “spray paint rules” You can get close to your project without getting ugly drips, you can do a second coat after about 10-20 mins without something bad happening, you can spray it almost upside down and still get an even spray. And, it is cheap! It’s like $3.99 a can at Home Depot. So for me…Rust-o-leum wins 
I found some sparkly purple ones at Ross for 8 bucks and added them to the bunch.
I was struggling getting a good picture of them on the porch. Here is the end result, it looks even better in person. 
And here is sneak peak of the sticks I did for the mantel. More of that coming tomorrow.
Planters and Spray Paint
October 24, 2011 by Lynn
Filed under Halloween, Holiday Crafts
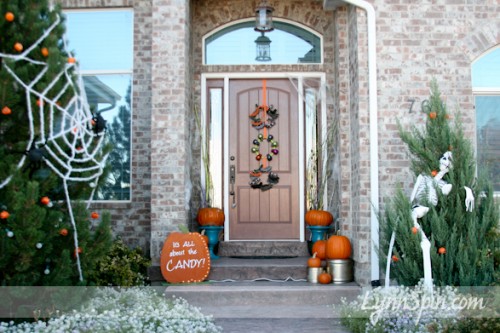
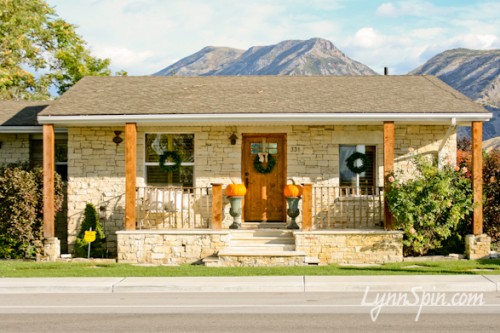
After taking all those fun photos of houses around Utah. I was on the hunt for some fun planters to set my pumpkins on.
Read more about this post HERE
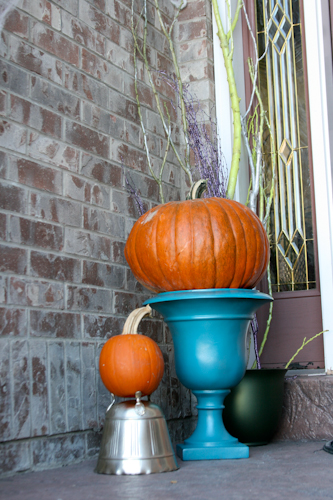
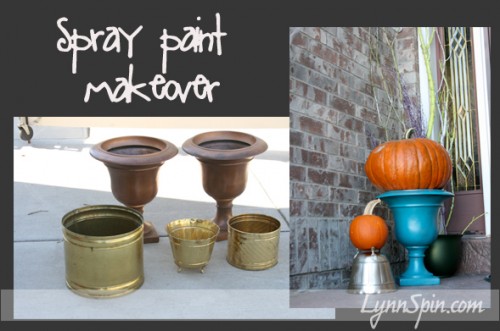
I found these on KSL. The two brown ones for 15 bucks and the set of three brass ones for 8. I have quite the stash of spray paint, so I busted some of those out and went to town.
These colors would be prefect for Thanksgiving, but I wanted to make the colors a little bit more exciting for Halloween.
My stash… is mostly blue tones. I decided to use a teal.
I didn’t put any color on the brass I just used Rust-o-leum Metallic- Titanium Silver. I also put this on over the teal planters. If you don’t spray it on thick or do multiple coats, you can still see the color underneath, but get a nice sparkle.
I think everything needs a little sparkle or glitter on Halloween 
Stay tune for the rest of my spooky Halloween front door! We are just getting started 
Making Home – Stylish and Fun = Me
October 19, 2011 by Lynn
Filed under Decorating, Featured Content, Home and Garden
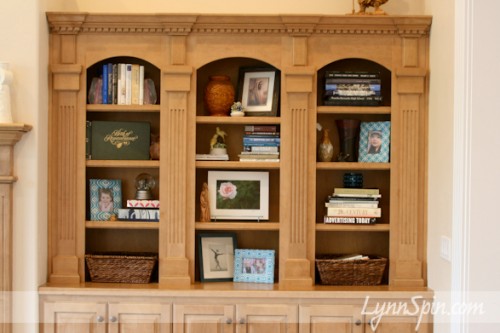
I was struggling with the big bookcase since I moved into this house 6 months ago. It is hard to make a rental house feel like YOUR home. Here is me attempting to make this space feel like it’s mine…for now. 
I had a nice bookcase I displayed stuff on in my old house, now I needed to recreate something new with my stuff in a new place. My bookcase in SD had three less compartments and was a bit smaller. Also since there wasn’t much on this, it seemed to be becoming the “junk spot.” The place where all the crap got left during the day.
So…my solution! Stacking some fun books in a cool way, displaying photos I love of my children in fun colorful frames, putting out some of my favorite things -little frogs I collect, snow-globe of Seattle, photo I took from my first photography class, and a few other fun things that make me happy to look at. Cuz that is what it is about people! Things YOU like.  I added the warrior man on top, because my hubs needs a few things he likes here and there too.
I also added two baskets- one for remotes and the other for library books. We needed a spot for both, since they both seem to get lost so easily. 
I think the blue fabric frames pop and I like that they are different but have a common theme and size.
I love that the things on the have special memories for me. The vase in the top middle we got on our honey-moon. The picture of Christ was a wedding gift. The birds on the second self down were a wedding gift to my parents. The Joseph and Mary carving on the third self down was from my trip to Israel. The flower picture was from my first photography class. These things make me smile. And you want to smile as you walk through your house. Make the space yours.
The vases are both from my dad. The tall one he bought for me and the shorter one he made when he was in college. My mom gave me that butterfly and I collect frogs. And of course Beck. 
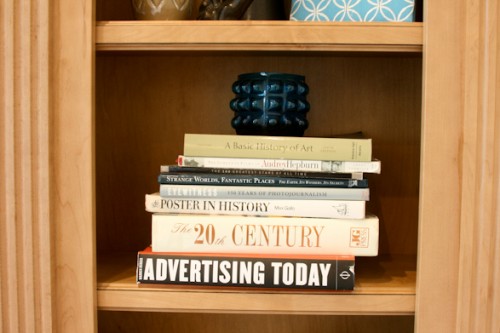 Books I love. Basic Art History, The 20th Century, Posters in History, Audrey Hepburn biography, Strange Worlds- Fantastic Places, Eyewitness- 150 years of photojournalism. Good stuff.
  In a few of the other compartments we have religious books, year books (I loved looking at my parents year books, I want my kids to be able to look at mine too), books I am currently reading, a few photo albums, and Devan’s families Book of Remembrance.
This bookshelf is a main focal point in my house so I am making it stylish and fun and reflect things I love. 
Now to spookify it 
And the rest of my house 
Find he eek block tutorial HERE
Make the Franky block HERE
Marshmallow Fondant and Nemo Wave Cake
October 17, 2011 by Lynn
Filed under Birthday Parties, Cake, Featured Content, Holiday Crafts, Yummy Food
Marshmallow fondant is pretty stink’n easy to make. My sister in law makes some awesome cakes with marshmallow fondant. Over the phone, a few states away, she helped me make a sweet cake for Beck.
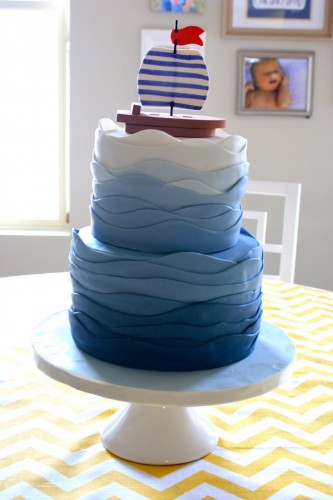
Here how I made my marshmallow fondant wave cake.
You will need to have:
1-2 packages of marshmallows, big or small.
2-5 tablespoons of water
About 8 cups of powdered sugar. 1-2 bags
vanilla, almond, or any kind of extract for flavoring
If you are doing all one color then go ahead and melt all your mallows in the same bowl. If you want to do a few different colors, split them up before melting them. Put your mallows in a microwave safe bowl and add 1-2 tablespoons of water. Stir them around until they are all slightly wet. Put a few drops of your extract in now. Add more water if needed, but just a little at a time. Place in the microwave on high for 30 seconds. Open and stir. Continue microwaving for 30 second until your marshmallows are melted.
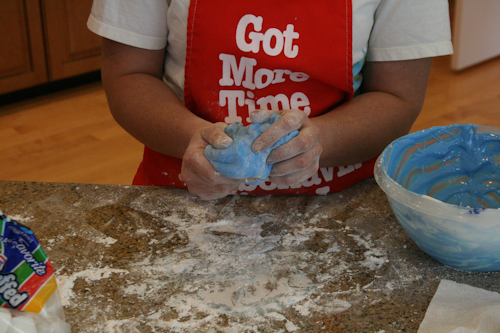
My apron says “Got more time for misbehave’n, since I started microwave’n.” Pretty sweet, I know 
Once they are melted, pour 1 cup of powdered sugar into the bowl. Mix until it thickens up. Spread powdered sugar on the counter. Take the fondant out of the bowl and start to knead it. It will be very sticky! My sister in law recommends putting shortening on your hands to help. She also adds about 1/2 cup to her fondant, but I didn’t. You can do it either way.
Keep kneading and adding powdered sugar until becomes a firm ball. It will still be a little sticky when it is stretched out. No worries. Place ball, double wrapped, in saran wrap over night. It will not be as sticky they next day.
When you roll it out make sure there is flour underneath to keep if from sticking to the counter. You will not see that side of the fondant. You might also need a little flour on the rolling pin, but if it shows on your top side just take a damp cloth and wipe it off.
I was inspired to make these waves from this picture I saw on 6th Street Design School Blog. Check out this blog. It has a lot of beautiful stylish ideas for your home.
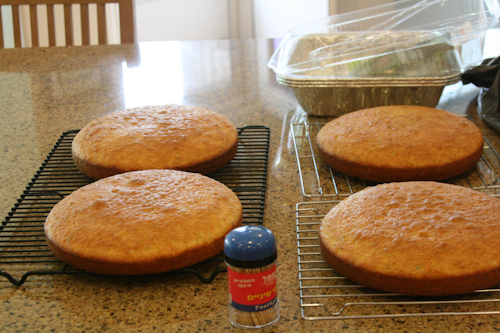
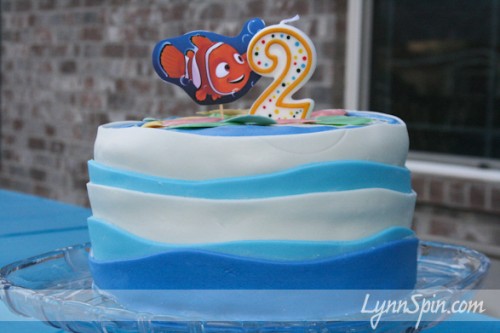
I love this beautiful wave cake, but I am not yet up to this kind of cake making par. So, I made just one tier. I used three different fondant colors. AND, I used a box to make my cake 
After making these and letting them cool for a bit; I trim off the tops to make them flat. I then layered them with frosting and home made raspberry jam.
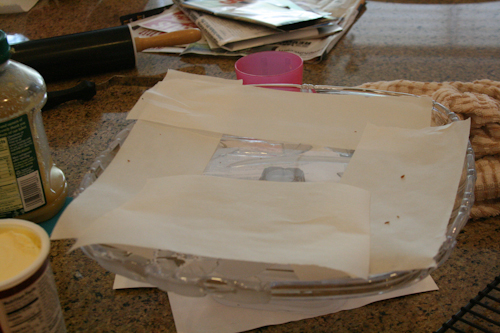
This handy tip I learned from Sandra Lee. Place some parchment paper like so on your cake stand. This helps to keep the cake stand clean and you won’t have to try to move it once it’s iced either. Place your bottom cake piece down and begin to layer on here.
Once you’ve completely iced the outside of your cake with a thin layer of frosting, you can place your fondant on. Roll out your fondant (if you haven’t already) and cut it wavy like with your pizza cutter. Start at the top of the cake and layer going down. This can be tricky, but hopefully the little layer of frosting you put on the cake will act like glue and hold the waves on. I also put tooth picks in the back of the cake, until the waves were secure. Once it is ready for the party remove the parchment paper by gently pulling it out from under the cake.
You can do it! Make a cool cake for your kid. Then proceed to do a happy dance. You deserve it. 
Nemo Party and Fun B-day Photo Idea
October 17, 2011 by Lynn
Filed under Birthday Parties, Featured Content, Holiday Crafts, Photography, Photoshop
My little man just turned two. He is crazy about Nemo. We threw him a Nemo themed party and here are some of the fun things we did:
When the kids first arrived they each got their own apron. (From the dollar store) And we made fish paintings with their hands. Since most of the kids where little the parents needed to help and we did it one step at a time.  We tried not to have too much paint on the table at once.
Beck is so proud of this painting. He makes sure I look at it at least once a week 
We then ate some good food!
The hubs used a permanent marker to trace it out then, craved the watermelon. Probably took 20 mins.
After eating we had a little scavenger hunt with fish cut outs hidden around the yard that had clues written on them.
It lead us to the “goodie bags.” The kids were stoked.
Then cake and ice cream of course. Beck is sooo cute.
Find How I made this cake and the Marshmallow Fondant Recipe HERE.
It was a fun party. Thanks for turning 2 Beck!
Should say age 2. But, here is something fun you can do with your child’s picture. Take a picture of them with enough space on one side so you can do some writing. Easy to do in Photoshop at a beginner level. Just choose the Type tool, front color, and write down what they love. You can do this 
Thrifty Pumpkin Find and Makeover
October 13, 2011 by Lynn
Filed under Crafts, Featured Content, Halloween, Holiday Crafts
I found this pumpkin at Savers the other day. I was a little wobbly, but I figured I could fix that. Check out the makeover this plan pumpkin got.
Go see what your thrift store has. It’s like a treasure hunt!
I added a little paint and glitter to my 7 dollar, 2 foot tall pumpkin. It looked better already.
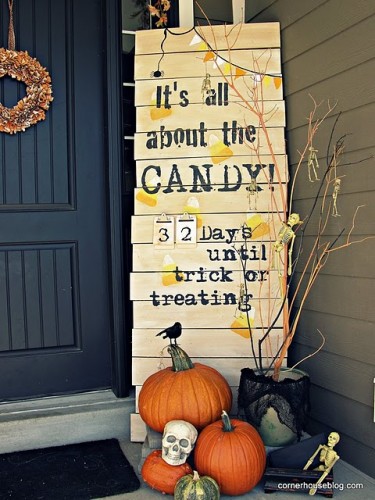
I had been want to make something like this, that I saw over at TheCornerHouseBlog.com
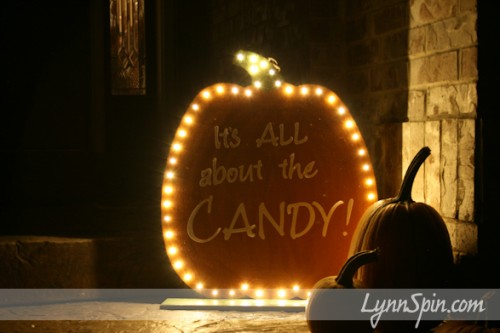
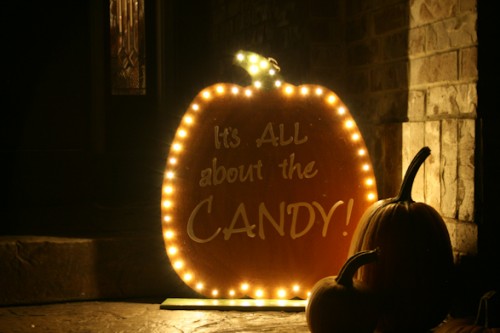
Very fun idea. I love this. I wanted to add a countdown and I loved the “It’s all about the CANDY!” I couldn’t fit it all on my pumpkin. So, I just went with the “candy phrase.”
Thanks for the inspiration Corner House Blog!
I cut some vinyl on my Cricut and this is what I made 
I thought about winding ribbon through all those holes. I decided my kids would love to see it lit-up at night and went with some Christmas lights instead. I am pretty sure that is why they are there anyway. 
TAA DAA!
I love Halloween!
I linked up here!
