TV Stand- Refinishing, Distressing, Antiquing
July 7, 2011 by Lynn
Filed under Featured Content, Furniture Redos, Home and Garden
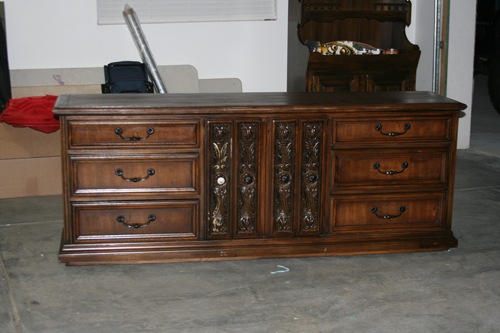
I bought this dresser off KSL – (Utah’s version of Craigslist) – for $80. I then got to work.
Here is how I transformed this dresser into my TV stand
I started by going into one of my favorite Utah furniture stores that specializes in painting wood furniture. They helped me pick out the paints I wanted and gave me a few tips on how to tackle this project. I want to share these tips with you and more that I learned from trial and error 
The first thing you want to do when refinishing a piece is sand. I used a #220 grit sand paper to sand this baby down. Since I was painting the whole piece I didn’t worry too much about getting all the way down to the wood (except in the areas I wanted to see a more distressed look). I made myself a little map of where those areas were before I started to paint. You really just need to sand enough for the paint to have something to stick to. After sanding, I then wiped down piece completely to get rid of dust.
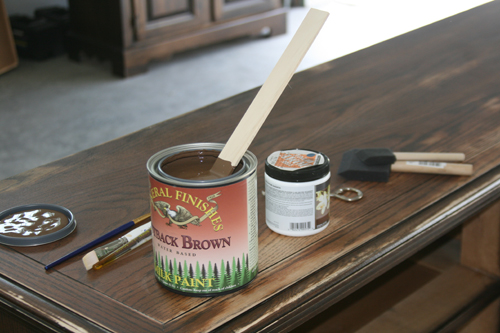
I then applied a thin coat of paint with a foam brush (this helps to minimize brush strokes and get a more even layer) I let this dry about 5-6 hours, then I used my #220 grit sand paper to lightly sand again. I made sure to look back at my distressing map to sand those areas extra well. Wiped it down again and painted again. Repeating these steps until the grain of the wood was no longer visible.
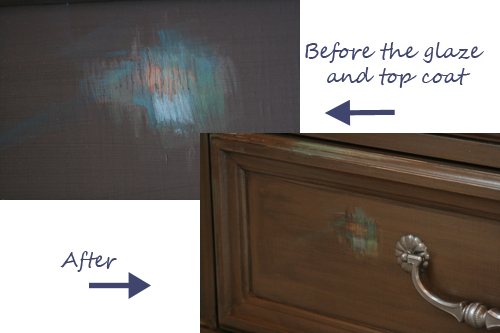
After the brown paint was done being applied I used a #150 grit sand paper for extra distressing. I wiped it down and added in my pops of baby blue, green, and teal. I used the foam brush and an art paint brush to cover the small areas. I sanded down the distressed areas onces more with my #220 and #150 sand paper.
I then added a dark brown glaze over the top of the whole piece. I let this dry for 2 days.
Finally I added a top coat. I very lightly sanded/buffed the piece with #600 grit sand paper. Wiped it again. Then following the directions on my top coat can, began to apply it with a foam brush. I let it dry a day, then sanded, wiped, brushed on the top coat again. I did this three times. Then I was done! This took about a month for me from start to finish. I was more work than I thought, but it turned out great.
More Tips!
Remember to stir the top coat. Do not shake it or that will create bubbles.
Use an actually glaze not a stain to go over your piece for the antiqued look. Stain will wipe off as you add your top coat. Very frustrating. Don’t listen to anyone who tells you to use a stain over a layer of paint. It doesn’t stay on.
Foam brushes work great, buy them from Micheal’s. They are better quality there than Home Depot.
Flow-trol also is great for smoothing out paint brush lines. Just add it to your paint can.
I took out the top two drawers to store our TV components and I spray painted the handles.
I hope these tips help you with your next project!
Done piece!











LOVE it! It looks great Lynn!!!!!! One of these days I’ll tackle my bedroom furniture:)