Making a Table- The Process
December 15, 2011 by Lynn
Filed under Decorating, DIY, Featured Content, Home and Garden
I really really wanted a new dinning room table when we moved. But, a few things kept taking priority over buying a new table. Espeacially since the tables I liked where around 1500 to 3000 bucks. hmmm…. Dev (the hubs) wasn’t really feeling that. So for my b-day he told me he would make one before Thanksgiving.
Uh… he has never made a table before! What to do… Thinking thinking. I started to cut out pictures and read blogs about what I wanted. Then like a present the Lowes project magazine came in the mail with instructions on how to build a table. It didn’t look to hard.
We went and bought all the wood a week later.
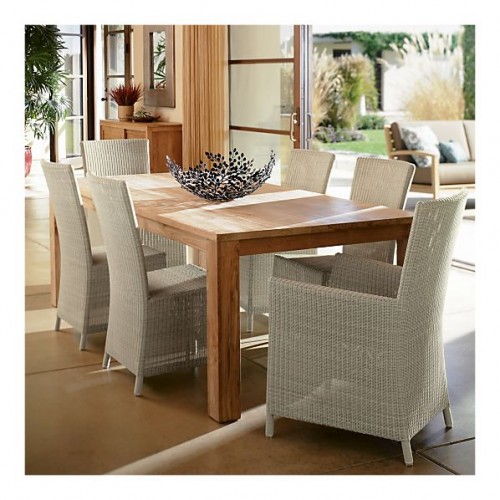
This table from Crate and Barrel is one I have had my eye on for years. We modeled our table after it.
I told Dev that if we were going to build our own table I wanted to do it for under $100. And! I wanted it to fit 10 people. He liked my challenge.
We bought pine 2×6 x8 boards for the top
2×4 for the ends of the top and the frame
4×4’s for the legs
We did a few things differently than the Lowe’s directions. But, it helped to have an idea of how to start. Mostly we used the directions for the frame (which I’ll share below). We wanted the table top to be seamless. So instead of the Lowe’s way, we changed it up a bit. We started by trimming up the sides of the 2×6’s to make them flat. 2×6’s from the store are slightly curved.
After cutting those we used a biscuit joiner to cut into the sides of the wood. We put biscuits and wood glue between the boards and clamped them together, adding one board at a time. The table was large so we used pipe clamps to hold it all together.
We planed the ends then put the end board on using a router to cut a tongue and groove joint. Then glued it and clamped it again with the pipe clamps.
We then used our hand planer to smooth/even out the top. After that was done we used 100 grit sand paper on the electric sander to smooth it out more. Ideally you would want to use a planer and run each board through it before starting to put the top together. OR! You could put the top all together and find a cabinet maker who would let you run the entire piece through one of their large industrial planers.
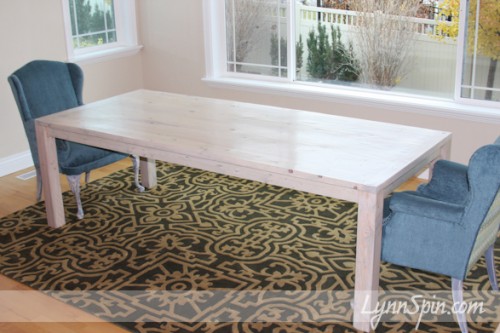
While the glue was hardening we picked out stains. I wanted a beachy farm house table feel. So we decided to do a gray stain with a white wash over the top.
Here is a link to the Lowe’s table directions that we used for the frame. Click HERE
We flipped the top upside down and started building the frame right on to it.
We used a pocket hole jig to join the top to the frame.
We changed the placement of the legs and moved ours to the edge of the table top, and secured them with lag screws. We inset only the apron piece.
Then we flipped it back over and filled some of the knots and holes with stainable wood filler.
You should probably use gloves here….oops
After that was dry we sanded the entire piece with 220 grit sand paper.
Before staining the table, we prepped it with Minwax Pre-Stain Wood Conditioner. This helps a lot!! It helps you get an even stain, avoiding ugly blotches.
I then stained it with a weathered oak stain.
After that was dry I went over it with a white wash.
To finish the table we applied 4 coats of a water based polyurethane.
We built a solid table for under $100 dollars in less than a week. AND! It seats 10 people.
We already have plans to build another one! Ha, I know, we are crazy. But, we had a ton of fun doing this project together. I love my man.
This table might be for sale soon, if you want it let me know 
The next table will have turned legs, with a darker stained top and painted legs. I am excited to do it again  Stay tuned for that one sometime in January 2012!
Please leave me some comment love! 


